Introduction
In this guide you will find all the resources you need to get up and running with creating instructional videos from your desktop and publishing to your course.

Getting Started An Instructional Video Workflow
 Step One
Define learning outcomes you want for the video.
 Step Two
Create or collect instructional materials, like visuals, slide decks, websites, etc. Or, if you plan to record yourself working problem sets or demonstrating a programming language, prepare your workspace accordingly.
 Step Three
Select a screencasting app.
 Step Four
Record video.
 Step Five
Publish to streaming server.
 Step Six
Share video by adding a link to your course site or Blackboard.
Success!
Remember, the more you create instructional videos the faster your workflow will become and the better your content will be. We suggest experimenting with different screencasting apps and streaming platforms before settling on your favorites.
Best Practices
Before you begin recording instructional videos, there are many things to consider from the content you plan to record to the way that you record it. All of these considerations are important, and below we outline some of the most salient topics required to produce valuable content for student learning.
Essential Questions to Consider Before Creating a Video
Initial Questions
- What do you want to capture in the recording?
- Why is it important to capture information this way?
- What is your comfort level with screencasting/video capture?
- How much time do you want to spend on your videos?
How Long Should Your Videos Be?
This study from researchers at the University of Wisconsin-Stout asked students about the impact videos have on their learning. The study concludes, “A majority of students believed the videos helped them learn course content and that the videos were best kept to less than 15 minutes in length.” The methodology section has detailed information on producing videos for online courses.
Questions About the Why, What, and How:
- What are your instructional goals?
- How does video fit into your course structure?
- How long will your video be?
- What tools/techniques will you use to engage your students?
- Will you use a script?
- What materials do you need to prepare?
- What platform will your video be delivered on?
Preparing your space
Prepare Your desktop
- Turn off notifications (Email, instant messages, etc.)
- Either select a window capturing only the application / slide or clean up your desktop and have an appropriate background images
- If using full screen capture, make sure to hide your control panel so it won't be captured
Eliminate Background Noise
- Turn off air conditioner or heat
- Be aware of your pet(s)
- Turn off your cell phone
- Tell the people you share space with that you are recording
If you plan to record yourself along with your desktop, consider the following as well.
Eliminate Visual Distractions
- Don't wear patters or other distracting clothing
- Record in front of a neutral Background
- Make sure your clothes don't blend in with the Background
Provide Good lighting
- Reduce glare from your windows
- Make sure the viewer can see your face
- Make sure your display is properly lit
- Make sure your lighting is evenly distributed
Screencasting Apps
Below we list the three most common apps for screencasting (or, digitally recording your computer screen). While there are many more out there, these three are the most common and the easiest to use.

https://www.techsmith.com/screen-capture.html
Summary
Snagit is probably the most user-friendly and reliable screen-capture and screencasting software on the market. With high quality recordings and a multitude of easy export options, Snagit is a great choice for instructors wanting to create their own video content.
Cost
$29
Overview

http://screencast-o-matic.com/
Summary
Similar to Snagit, Screencast-o-matic is a great option for screen-capture and screencasting. While slightly less user-friendly, it clearly makes up for it on all the additional features for post-recording production, such as adding music, titles, blurs, images, etc. to your recording.
Cost
Free (limited recording and watermark)
$15/1yr
$29/3yrs
Overview
https://youtu.be/qW0TjKzQK0M
https://products.office.com/en-us/powerpoint
Summary
In addition to creating presentations, Microsoft Powerpoint version 2016 and later includes "Recording" as part of its default features. With PowerPoint Recording you can narrate over your slide presentation or even record a screencast outside PowerPoint. This is very convenient for heavy users of PowerPoint who do not want to learn a new software.
Cost
Free (with Office 365 - available to all UH Faculty and Staff)
Overview
Hardware
Most desktops and laptops come with webcams and microphones. However, you may be using an older computer that does not have these items, or you may want to upgrade in order to get better sound and video quality. Below are some suggested external tools to help you create high quality screencasts.
Webcams
Top pick: Logitech C920
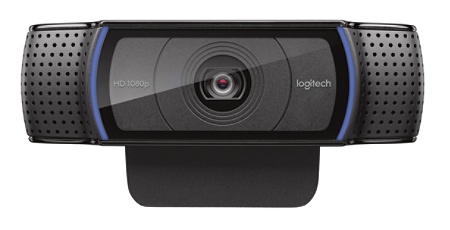
Price: $50
Logitech site: https://www.logitech.com/en-us/product/hd-pro-webcam-c920
Amazon: http://a.co/d/hSj2KcI
Budget pick: Microsoft LifeCam HD-3000
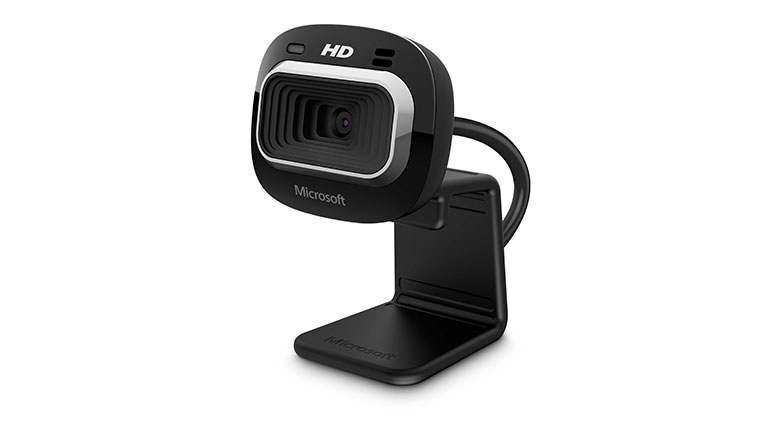
Price: $28
Microsoft site: https://www.microsoft.com/accessories/en-us/products/webcams/lifecam-hd-3000/t3h-00011
Amazon: http://a.co/d/fH2n8AN
Microphones
Top pick: Blue Yeti Nano
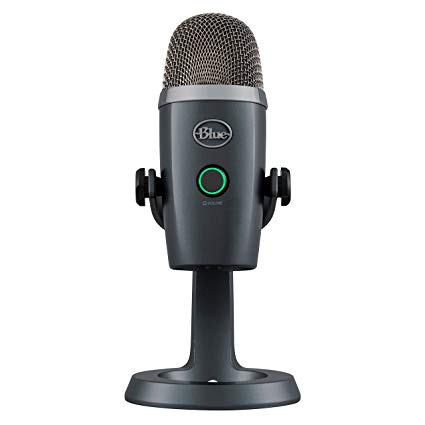
Price: $99
Blue site: https://www.bluedesigns.com/products/yeti-nano/
Amazon: http://a.co/d/fqehBAi
Budget pick: Samson Go Mic
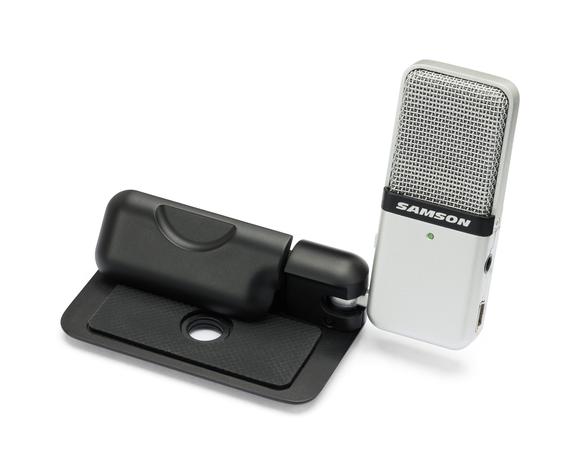
Price: $39.99
Samson site: http://www.samsontech.com/samson/products/microphones/usb-microphones/gomic/
Amazon: http://a.co/d/emiXgSW
Pen Tablets
Top Pick: Wacom Intuos S

Price: $69.49
Wacom site: https://www.wacom.com/en-us/products/pen-tablets/wacom-intuos
Amazon: http://a.co/d/4Q7EjeD
Budget Pick: Huion 420

Price: $21.24
Huion site: https://www.huiontablet.com/all-products/graphic-tablets/420.html
Amazon: http://a.co/d/4DGZbzz
Streaming Platforms
Once you have your instructional video created, you'll need to find a platform to host it and share it with your students to stream. Below you will find our suggestions for streaming platforms. There is no one-size-fits all solution, so we encourage instructors to try out a few or all the options below to see which one has the most features and best usability for their own situation.
Microsoft OneDrive

https://onedrive.live.com/about/en-us/
Login to your UH Microsoft 365 / OneDrive account at https://accessuh.edu
Summary
Microsoft OneDrive is available to all UH Faculty and Staff for free. With 1TB of storage space, it is a great place to store video. In addition, since it is linked with Cougarnet authentication, it is possible to limit content to only those with active Cougarnet users (UH students, faculty and staff). It is also possible to restrict access to certain individuals within the UH community.
Pros
- Easy to use
- Ability to add videos to a folder and share the folder
- Works great on any device
- Allows videos to be downloaded
- Easy to sync with OneDrive app on both PC and Mac
Security
- Security settings for video on Microsoft OneDrive are familiar with those who have used Google Drive or other similar platforms
- Specific people - Allow specific people within the UH Community to view your video
- Anyone with a link - Anyone with a link can view your video, but it is not searchable. Additionally, you can allow anyone with a link to:
- View only
- Edit (applies only to video information, since OneDrive doesn't have any online editing tools.)
- Public - Anyone can view your video who has a link
Cons
- Cannot disable downloading of videos (downloading button is viewable in the player)
- Difficult to embed video into a website or course site
Pro Tip
Share a OneDrive folder to your class that has all the videos in it. That way anytime you add a new video students will have access.
Microsoft Stream
https://www.microsoft.com/en-us/microsoft-365/microsoft-stream
Login to your UH Microsoft 365 / Stream account at https://accessuh.edu
Summary
Microsoft Stream is available to all UH Faculty and Staff. It is like YouTube, but videos are only accessible to UH members. Videos can be shared to individuals, groups, or the whole organization.
Pros
- Easy to use
- Transcripts are automatically generated and can be edited
- Videos can’t be downloaded by viewers
Security
Cougarnet login is required to view videos in Microsoft Stream. Videos can be shared to individuals, groups, or the whole organization.
Cons
- No analytics on viewers
Youtube

Summary
Youtube is a great, free platform for hosting instructional videos, especially if you want to create libraries of on-demand resources for your students.
Pros
- Universally recognized
- Unlimited storage
- Easy to use
- Ability to create playlists to group videos for courses/modules
- Works great on any device
- Advanced online video editor
- Generates an automatic closed caption track that can be edited for accuracy
Security
- Youtube has three security settings for videos and playlists:
- Public videos and playlists can be seen by and shared with anyone.
- Private videos and playlists can only be seen by owner and the users the owner chooses.
- Unlisted videos and playlists can be seen and shared by anyone with the link.
| Feature | Unlisted | Private | Public |
|---|---|---|---|
| Can share URL | Yes | No | Yes |
| Can be added to a channel section | Yes | No | Yes |
| Shows up in search and related videos | No | No | Yes |
| Posted on your channel | No | No | Yes |
| Shows in Subscriber feed | No | No | Yes |
Cons
- Advertisements may appear on your video
Vimeo

Summary
Vimeo is very similar to Youtube, with more security settings and advanced customization. It is an excellent platform used by many documentary film makers and independent artists.
Pros
- Easy to use
- Ability to create playlists to group videos for courses/modules
- Works great on any device
- Add closed captioning file
- Create Custom URLs for videos
- Advanced security
- Allow videos to be downloaded
- Vimeo never puts ads before, after, or on top of videos.
Security
- Vimeo has a few more security settings than Youtube.
- Anyone - videos are Public
- Only me - videos can only be seen by owner
- Only people I follow - videos can only be seen by owner and Vimeo users the owner follows
- Only people I choose - videos can only be seen by owner and selected Vimeo users
- Only people with a password videos can only be seen by people with a correct password
- Only people with a private link - videos can only be seen by people who have the link (Plus account only)
- Hide this video from Vimeo.com - videos can be embedded on other sites but can't be viewed on Vimeo.com (Plus account only)
- For more on Vimeo's security settings see their Privacy Settings Overview
Cons
- Free Vimeo account limits how much you can upload. Additional storage and functionality can be purchased.
CASA Cloud
Instructions on how to create a CASA Cloud account: http://www.instruction.uh.edu/knowledgebase_category/casa-cloud/
Summary
CASA Cloud is a basic cloud storage platform developed at UH in the Center for Academic Support and Assessment. It is available to faculty to use for file storage and sharing, including video.
Pros
- Easy to use
- No storage restrictions
- Host any type of file
- No new account needed / uses Cougarnet ID
- Ability to restrict access to Blackboard users
- Works on any device
Security
- Public - Anyone can view publicly
- Restricted
- Blackboard - Accessible only from a link within a Blackboard course
- CASA - Accessible only from a link within a CASA course
Cons
- Cannot create playlists, channels or share folders
Resources
Below you will find articles from this site as well as others that discuss various aspects of creating instructional videos.
Articles on Instruction @ UH
How to Get Students to Watch Your Instructional Videos
Narration Tips for Audio Recording
Start a Youtube Video Where You Want
Integrating Video into Your Course
Research Articles
How Video Production Affects Student Engagement: An Empirical Study of MOOC Videos
Video and Online Learning: Critical Reflections From the Field
Featured image by Ellyot
