- /
- /
- /
How to Upload Canvas Final Grades to PeopleSoft
New Method: Import Canvas Grades to myUH Grade Roster
You can now import canvas grades in myUH with the click of a button.
Please view the written guide here: myUH Canvas Import
You can also view a step-by-step video guide.
Old Method
At the end of semester, you can upload students’ final grades from Canvas Gradebook to myUH PeopleSoft. The following instructions show you how to do it.
Part I. Downloading Gradebook from Canvas
1. Add the letter grade to the final total and then download the gradebook.
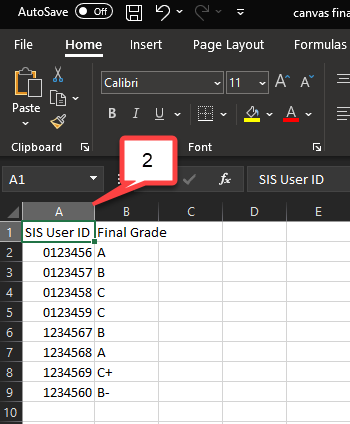
2. Delete all columns except for the “SIS User ID” column and the Final Grade letter column you want to upload.
Note: SIS User ID is the PeopleSoft ID.
However, the “SIS User ID” column in downloaded grade book is not formatted correctly to upload to PeopleSoft. The following part 2 shows you how to reformat the “SIS User ID”
Part II. Adding leading 0
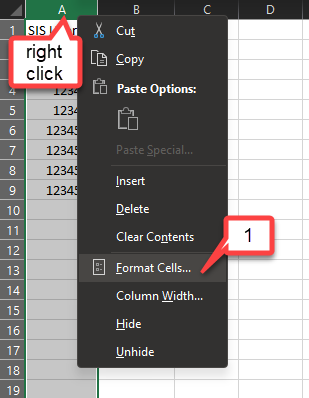
1. With the “SIS User ID” column selected, right click and select Format Cells.
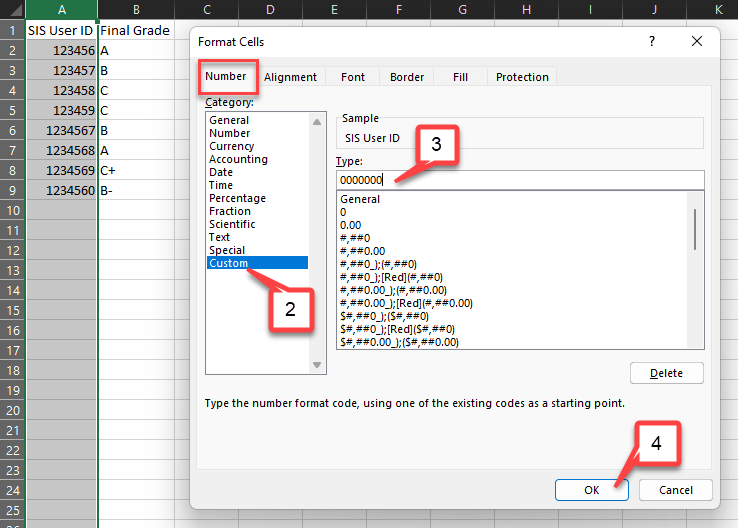
2. In the Number tab > Category, click Custom.
3. In the Type field, delete General and enter seven 0: 0000000
4. Click OK. The leading zero will be added to all PSIDs.
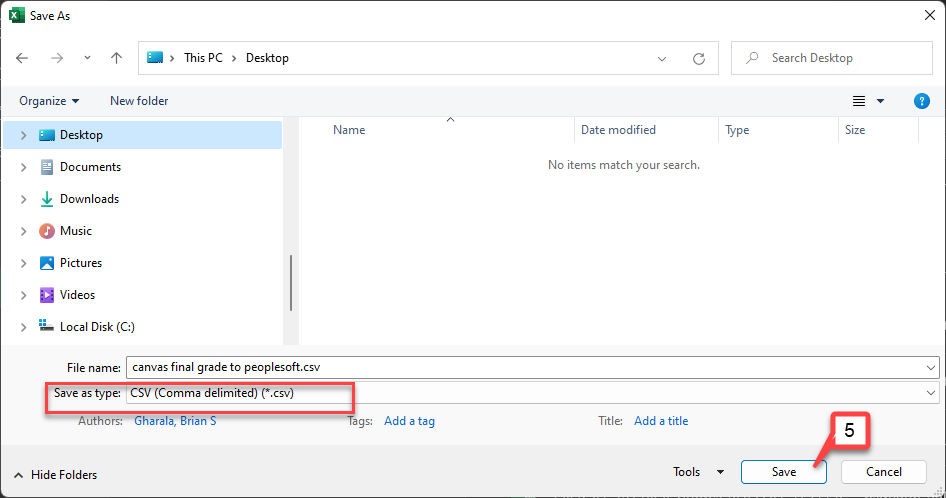
5. Save the file as .CSV (Comma Delimited) for PC or CSV (Windows) for Mac.
Part III. Uploading to PeopleSoft
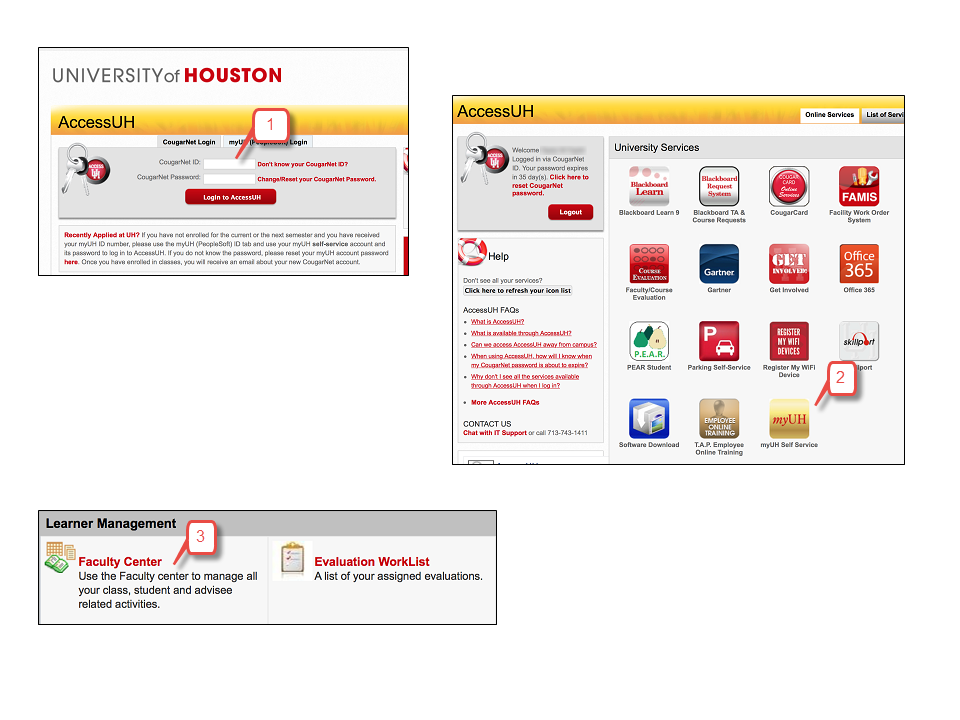
1. Go to http://accessuh.uh.edu and enter your CougarNet ID and Password.
2. Once logged in, click on the myUH/UH Self-Service icon.
3. On the main page, click Faculty Center.
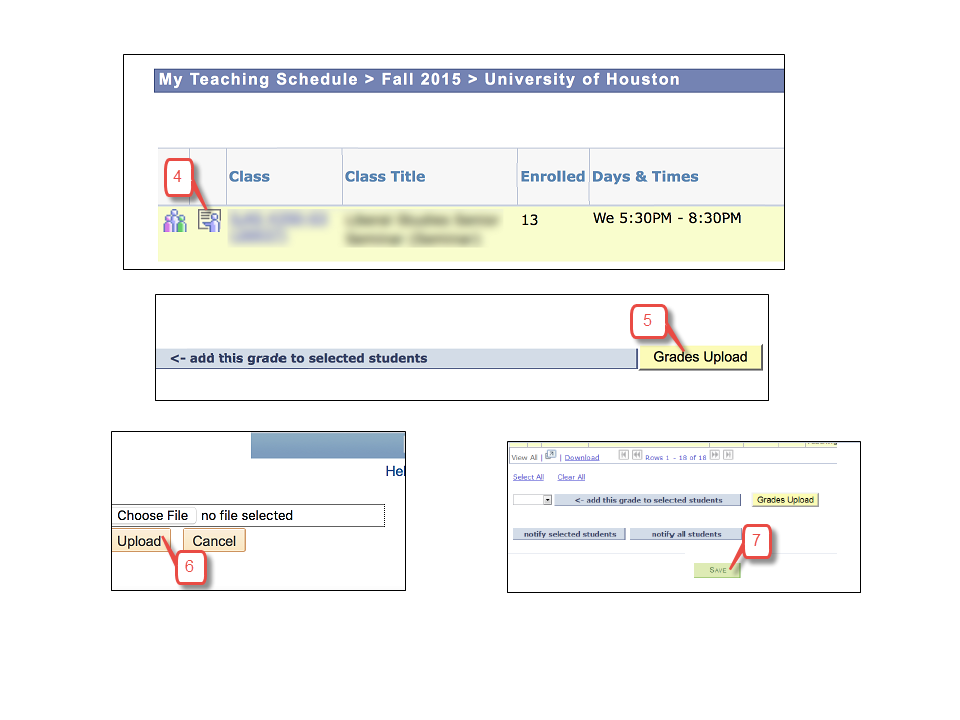
4. A list of your current courses will appear. Click on the Grade Roster icon to assign grades for a particular course or section.
5. To upload grades using the excel spreadsheet (.csv file format), scroll down the page, and click on the Grades Upload button.
6. Choose the .csv file and click Upload.
7. After the Excel spreadsheet (.csv file format) has been uploaded, the system will update. Scroll down and click Save.

